How to make personalized photo coasters perfect for gift giving!
Now that Christmas has passed, I wanted to share one last personalized DIY gift.
I love making personalized gifts for Christmas and try to make one every year that my kids can give to their grandparents. In the past, I've made photo books, calendars, and personalized pendant necklaces. This year, I decided to DIY simple and affordable DIY coasters.
***Update*** Plaid now makes a dishwasher-safe Mod Podge that can be used instead.
SUPPLIES NEEDED TO MAKE DIY PHOTO COASTERS
(Affiliate links have been used)
- 4x4 white ceramic tiles (I got mine from Home Depot for $0.16 a piece)
- Photos or scrapbook paper
- Metal file
- Foam brush
- Metal file
- Foam brush
- Fine grit sandpaper
- Scissors or paper cutter
- Scissors or paper cutter
- Cork sheet (I bought thin sheets of cork from Michaels)
HOW TO MAKE DIY PHOTO COASTERS
Before I get to the tutorial, I want to answer a few frequently asked questions to better help you create the best tile photo coasters.
DO YOU HAVE TO USE REAL PHOTOS?
For best results, professionally printed photos are ideal, but if that's not an option, laserjet copies work too. Avoid using inkjet printed photos as they will bleed once the Mod Podge is applied.
HOW DO YOU SEAL PHOTO COASTERS?
Photo coasters will need to be sealed in order to use them without causing damage. There are a few options to choose from when it comes to properly sealing coasters. Water-based Polycrylic, dishwasher-safe Mod Podge, or clear polyurethane spray are all great options.
Regardless of what sealer you choose to use, be sure to apply 2-3 light coats for best results.
STEP ONE: CUT PICTURES
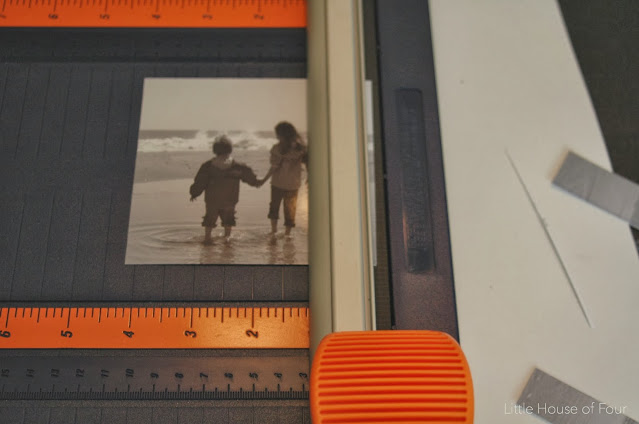
Cut pictures to size so they fit on top of the white tiles. I like to use a paper trimmer to ensure I get clean and even lines.STEP TWO: APPLY MOD PODGE
Apply a thin layer of Mod Podge to the top of a ceramic tile. Gently place a picture on top of the wet Mod Podge, making sure to smooth out any air bubbles. Once the Mod Podge is completely dry, apply a thin layer of Mod Podge to the top of the photo. Don't worry, Mod Podge dries clear.STEP THREE: SEAL COASTERS
When the Mod Podge is dry, apply two coats of water-based polycrylic to seal the picture. Mod Podge is not waterproof, so you need to use polyacrylic to keep water and other liquids from damaging the pictures***Update*** Plaid now makes a dishwasher-safe Mod Podge that can be used instead.
STEP FOUR: SAND TILE
Sand the edges of the tiles to smooth out any rough spots.STEP FIVE: ADD CORK
Trace the tiles onto cork sheets and then cut out the cork. I purchased adhesive cork sheets for $1.99 a piece from Michaels. They worked well, but I also glued the edges to be sure the cork stayed put.Are you making a set of DIY photo coasters for a friend or family member? Once the polyacrylic is fully cured (I recommend waiting at least 24 hours), stack the coasters together and tie them with jute for a great gift.
Since these easy DIY photo coasters were given to my family, I used pictures of my kids. You can always swap out personalized photos for scrapbook paper and give them to teachers, neighbors, family, or friends.


How many layers of dishwasher safe mod podge do you need to put on top of the picture?
ReplyDeleteHi! I would apply two coats just as you would if you used water-based poly.
DeleteWe made these this weekend. Cannot wait to give as gifts!! I did sand the sides before I applied the pictures
ReplyDelete