Hey, friends. Before I get to the latest mudroom project I want to take a minute to thank you all for your sweet comments from Monday. I was a little hesitate to share last Monday's post, but I'm so glad I did. The support from you all was unbelievable and I am overwhelmed by all the sincere comments and e-mails that I recieved. If I learned one thing from opening up and getting personal, it's that I am not alone. I am honored and extremely thankful that you all shared your own struggles and experiences. It's so easy to look around and compare our lives to others, to think they have it together. When in reality, everyone has some aspect of their life that isn't perfect. No one is perfect and that's okay, we don't have to be. I have to keep reminding myself that as long as my kids are happy and feel loved than I am doing okay. I am doing the best I can and my best has to be good enough.
Taking a week off has given me the opportunity to focus on what's important and also allow me to make some progress in the mudroom. Most people may recharge by relaxing, I on the other hand find joy in building and getting projects done around the house. Our mudroom addition has been a work in progress for over a year. It's been partly finished and the mess, dust and bare plywood have been making me twitchy. It was about time I turned this hodgepodge storage area into actual living space.
You may remember that this makeover is just temporary until we do our full kitchen renovation. The front of the room will still remain a mudroom (eventually, with hardwood floors, built in cubbies and plank walls) and the back of the room will be the kitchen addition. In the mean time, in order to make it livable I wanted to lay down inexpensive flooring.
As a reminder, here's what the room looked before.
As you can see it was becoming more of a storage room than an actual mudroom. It's been long over due that the floor get installed, but before I could start laying the planks I had to do a bit of prep work. I don't know what it is, but I dread prep work. Maybe it's my impatient side that just wants to dive right in and get straight to the after. Regardless, prepping a project is the most important part and needs to be done.As a reminder, here's what the room looked before.
First and foremost, the tongue and groove plywood needed to be nailed down and level. My husband marked all the joists while I screwed down the floor. I then used a shop vac to vacuum every bit of dust, dirt and speck of wood off the floor.
Once I had the floor clean it was time to prep the wood. A primer is needed if you want your vinyl planks to actually stick to the wood. Do not skip this step, vinyl planks WILL NOT stick to bare wood. We chose a multi purpose primer that was diluted in a 1-1 ratio with water. I simply mixed the primer and water in a bucket then rolled it on with a roller.
The floor ends up being a bit tacky once it dries. I suggest making sure you have enough time to prep and lay the planks within the same day or within a few days to eliminate your nice clean floor getting dirty again.
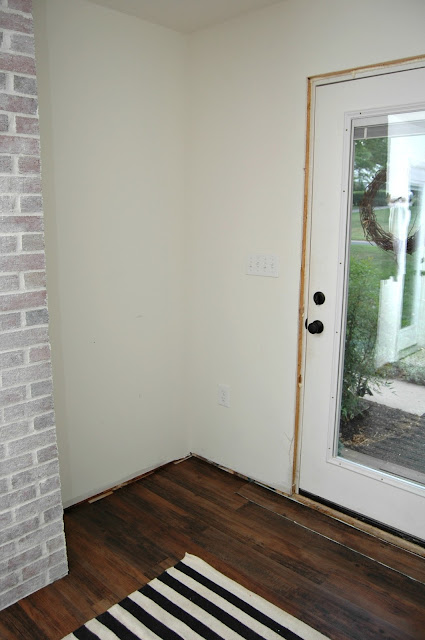
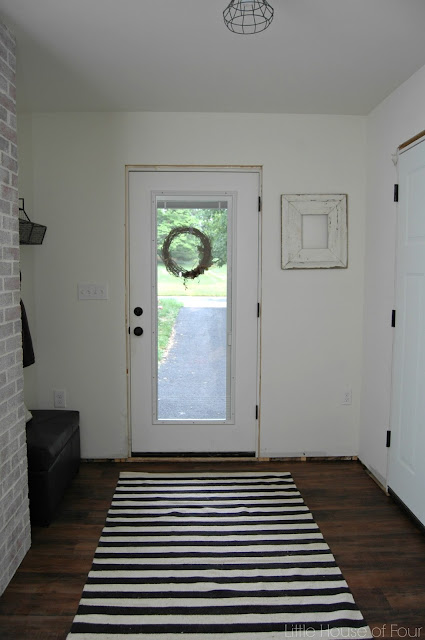
The vinyl planks actually went down pretty quick. The only area that required custom cuts was around the brick chimney.
For the time being, I brought up the kids toy box to get an idea what the area will look like.
And what would a makeover be without the obligatory before and after picture?
I can not believe how much the floor has completely changed this space. Even though the room has a long way to go, at least now it feels like an extension of our home rather than storage space. For those of you that are wondering, this is the floor I purchased. It's hard to tell in some pictures, but it's actually pretty dark and has a great hand scraped texture.
Still on the to do list for this room:
- Paint the doors
- Build custom bench
- Update and hang free light fixture
- Install trim molding
- Add sitting area on kitchen side
- Decorate


It looks fantastic Katie! A totally different space now! You must be thrilled to finally have a useful room! Can't wait to see what's up next!
ReplyDeleteThanks Kristi! You have no idea how great it feels to finally be working on this space. I'm looking forward to sharing the next update!
DeleteWe've installed vinyl plank flooring in almost every room in our house and never-ever considered using a primer base. Hmmm...
ReplyDeleteI'm sure it depends on what type of surface you are applying the vinyl floor to. It did not stick AT ALL to the plywood without a primer. I also had trouble in our laundry room sticking it directly to concrete. Although, I had no problem laying it overtop existing vinyl floors or to the backing of a bookcase. It just depends on the surface.
DeleteIt look SO amazing! I wish I had a lovely mudroom like yours! Also so glad that you got through more basement flooding - I hope it doesn't ever happen again!!
ReplyDeleteIt looks amazing! You did such a great job!
ReplyDeleteWhat a difference already! I can tell it's going to be gorgeous when it's all finished. I'm so jealous of all the space you have in there!
ReplyDeleteI hired the flooring professionals headed by Mr. Meyer to install floors in my home, and they handled the job with great perfection.
ReplyDelete