An easy tutorial for making vintage inspired signs using Dollar Tree foam board!
I'm so excited to share this incredibly easy Dollar Tree project! I've been making signs and transforming Dollar Tree products for a while now, so putting the two together to make affordable vintage inspired signs seemed like the next best idea.
I love that these DIY vintage signs are not only affordable to make, but they also use pre-cut letters, which means there's no need to mess with vinyl or fancy cutting machines.
SUPPLIES NEEDED TO MAKE EASY VINTAGE INSPIRED SIGNS
Affiliate links have been used
- Foam board from Dollar Tree
- Black Elmer's Adhesive letters
- Straight edge
- Elmer's glue stick
- Utility knife
- Ruller
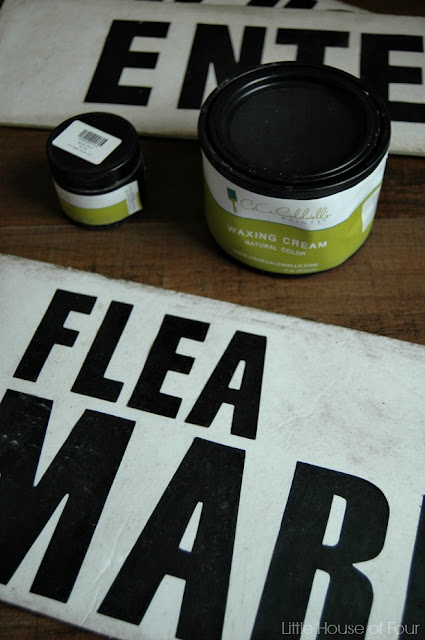
- Clear wax (I used CeCe Caldwell's)
- Aging Dust
- Wax brush
- Command Strips
HOW TO MAKE EASY VINTAGE SIGNS USING FOAM BOARD
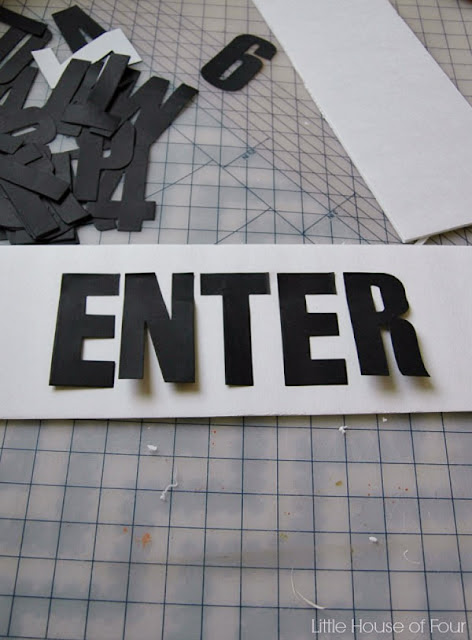
First, figure out what you want your sign to say. Then measure and use a straight edge and utility knife to cut the foam board. After your board is cut, use a ruler to arrange the letters evenly on the foam board.
Once the letters are arranged how you want them, use a glue stick to stick the letters in place.
Wait for the glue to dry then go over the entire board and letters with waxing cream. Don't skimp on the wax since this is what the aging dust is going to adhere to. I used CeCe Caldwell's wax and this waxing brush. The brush was a splurge, but totally worth the cost, especially if you plan on waxing larger furniture pieces.
After my foam boards were waxed I immediately dusted on the aging dust. I applied it heavier around the edges then worked inward toward the center of the sign.
I was having so much fun making these easy vintage inspired signs that I got ahead of myself and made a Christmas sign too, oops.
One of the signs says, "Truck Parking" and is hung above my son's closet in his bedroom. I just added two command strips to the back and stuck it up on the wall.
I also made a sign for over the mudroom door that leads to our garage. I used two different size adhesive letters for the Flea Market sign and it's one of my favorites.
The possibilities are endless when it comes to making these easy vintage inspired signs. You can age them as little or as much as you like or use multiple size adhesive letters like I did. Whatever you decide, they'll be sure to make a wonderful and affordable addition to your home.


Love using foam core! Such an easy and light weight alternative to wood and these look so realistic!
ReplyDeleteThey turned out awesome Katie!!! I never would have known they weren't wood!
ReplyDeleteThey look very vintage, Katie! Love the Flea market one especially! Kendra @ www.joyinourhome.com
ReplyDeleteThese look really good like the ageing effect, thanks for sharing.
ReplyDeleteThey look awesome! Something TheFruGirls have to try for some of their decorating projects ;-)
ReplyDeleteThese signs are fabulous!!! When I first saw foam core.... I thought no.... but wow they turned out fantastic! I love the antiquing dust, I'm going to have to look for that!
ReplyDeleteThanks so much for the great tutorial... pinning!
Oh my goodness, these look amazing! You would never know they were foam core! I so want to do this now! XO
ReplyDeleteSilly question but...How do you hang these?
ReplyDeleteI was wondering the same thing lol
DeleteThey are very light, so I just use command strips to hang them :)
DeleteThese turned out beautifully! As I tend to work with wood. I would of never of guessed your signs where foam board. Well done! My question is, where would I find the aging dust?
ReplyDeleteI got my aging dust from a local vintage shop that sells chalk paint, but you can also find it on ETSY.https://rstyle.me/n/cx95v4b6dx7
DeleteWhat a great idea! I am going to make some for my vintage booth. I will do a mix of foam board and then I have a ton of wood. So much easier than stenciling.
ReplyDelete