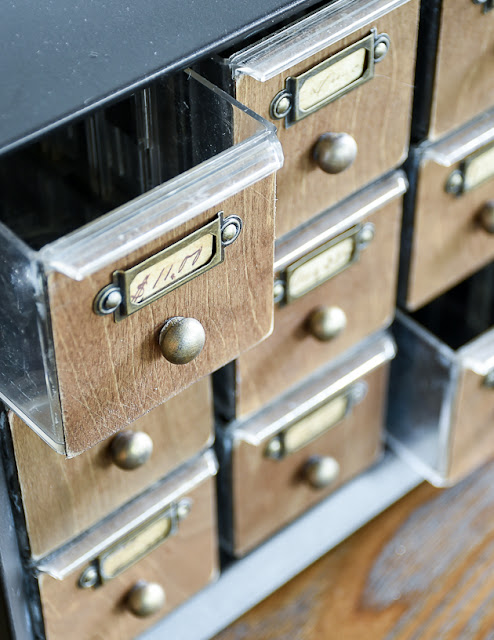
Give generic plastic storage organizers an industrial farmhouse makeover in just a few simple steps!
I'm a few days late for Monday's Dollar Tree makeover, but I was still in vacation mode and soaking up every last minute of the holiday break. Now that the kids are back to school, it's back to work for me.
If you follow me on Facebook or Instagram, you may have seen the picture I shared of my office just after Christmas. It ended up being a dumping zone for everything that came into our house and was a total disaster. I was determined to get my office clean by January 1st. Thankfully, I not only managed to get everything put away, donated, and organized, but I also created new inexpensive storage with Dollar Tree bins.
If you follow me on Facebook or Instagram, you may have seen the picture I shared of my office just after Christmas. It ended up being a dumping zone for everything that came into our house and was a total disaster. I was determined to get my office clean by January 1st. Thankfully, I not only managed to get everything put away, donated, and organized, but I also created new inexpensive storage with Dollar Tree bins.
SUPPLIES NEEDED TO TRANSFORM DOLLAR TREE STORAGE DRAWERS
- 4 Sets of Mini Storage Drawers (Dollar Tree tends to only carry these in January)
- 1 piece of 1"x 6"x 8' (or other scrap wood you have lying around)
- Fine Grit Sandpaper
- Oil Rubbed Bronze Spray Paint (Rust-Oelum holds up the best on plastic)
- Dap All Purpose Glue
- Minwax Espresso Stain
- Minwax Espresso Stain
- Small Screwdriver
- 8 Small Bronze Label Pulls (you can also get these at Michael's and use a 40-50% off coupon)
OPTIONAL SUPPLIES
- A thin piece of scrap 1/4" plywood if you want to put a back on the organizer (I didn't)
- Brad gun and nails (if you want a better hold)
- Hot Glue gun and glue stick
- Hot Glue gun and glue stick
HOW TO TRANSFORM BASIC DOLLAR TREE STORAGE DRAWERS
I decided to go horizontal with the bins instead of vertical, which meant I needed to make a box for them to sit in for a more finished look. I used a 1x6 that I cut into four pieces to build a frame around the drawers.
I didn't worry too much about coating the entire frame since the front and inside are all you will see.
Once the frames were dry, I used DAP all-purpose glue to glue the four frames together.
I was being lazy, so I only used wood glue to attach the wood frame to the storage drawers. I simply added glue to the top and bottom of the Dollar Tree bins and to the four-mitered ends of the wood. I clamped everything together and let it dry overnight.
***TIP*** If you want a sturdier hold, add a few nails to each joint using a brad nailer.
I used a small screwdriver to attach a bronze label pull to each drawer.
***TIP** The nails will stick through the plastic, but a dab of hot glue on the end will keep them from being sharp and pointy.
After I attached the hardware, I inserted all the drawers and placed the storage organizer on my freshly cleaned desk.
The drawers are empty, but will soon be filled with some of my most used hardware, labels, and pulls.
I have a "thing" for multi-drawer storage units, and this Dollar Tree makeover is the perfect addition to my collection of organizers.


Clever! These would be so useful for any crafter/artist. Make several this size and stack them for a card catalogue look. Great way to kickoff the new year, all organized.
ReplyDeleteLooks great, Katie! Already rockin' this FT gig! ;-)
ReplyDeleteThis looks amazing. You are so talent/creative. You nailed this project. Thanks for sharing. Happy 2018
ReplyDeleteI love this! Such a great way to give those (super useful but not very stylish) plastic bins a facelift!
ReplyDeleteThis is sooooooo good!
ReplyDelete💕 Thanks so much for the idea! I think I'll paint the drawers with an opaque color.
ReplyDelete