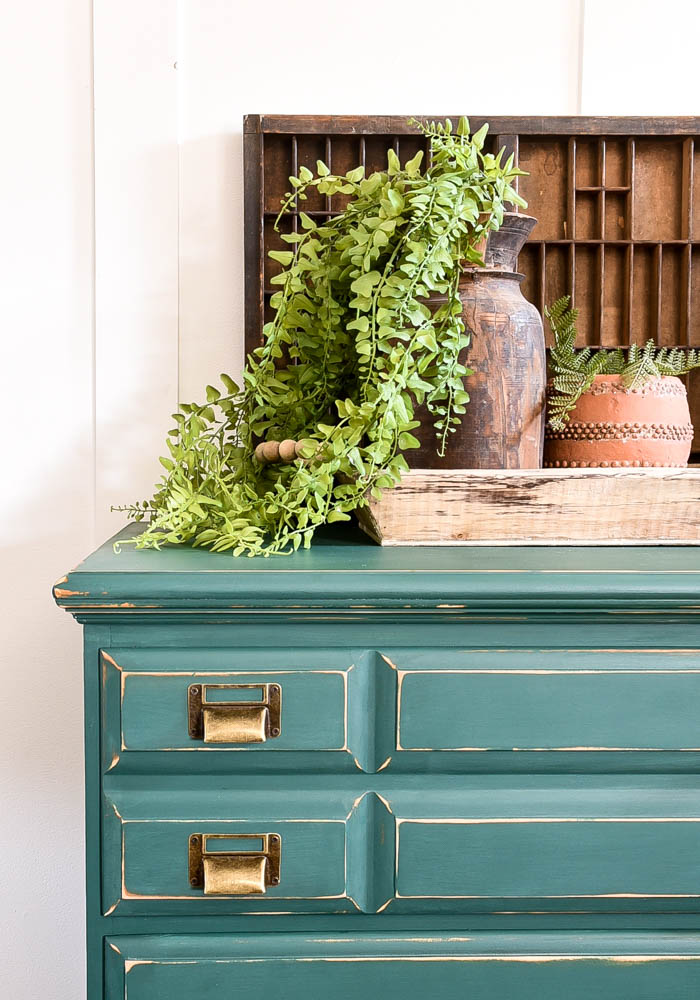
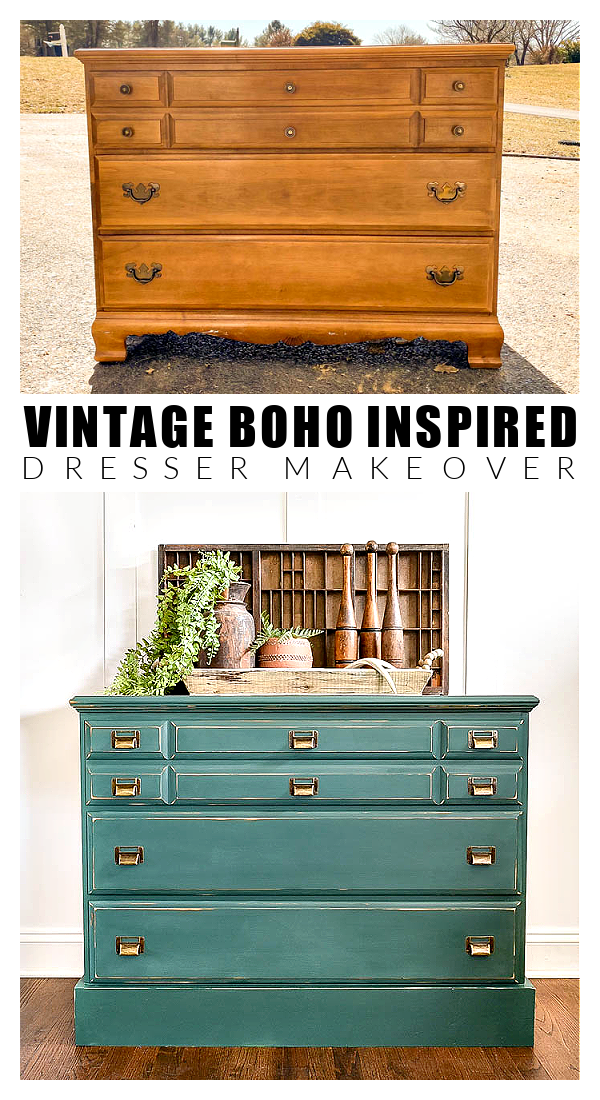
A dated dresser gets a vintage boho inspired makeover with bronze pulls and a fun pop of green!
Hey, hey! I'm back with another simple and affordable dresser makeover. If you follow me on Instagram then you may have already seen the transformation of this dated dresser turned fun vintage boho chest.
I'm much more active and on top of things on Instagram, but it's definitely been a while since I've blogged. That's only because I've been so busy and consumed with my vintage booth. Just like blogging, I love every aspect of hunting, picking, styling and curating my booth, so I'm definitely NOT complaining.
Having the booth allows me to do what makes my heart happy and blogging allows me to share everything with you. It's a win-win.
Okay, now back to today's furniture makeover and super affordable Facebook Marketplace find.
A lot of people tend to look over dated dressers with curvy bases, but they are actually incredibly easy to update. With just a little effort and DIY skills, you can easily turn an old and dated dresser into something you're proud to have in your home.
- SUPPLIES NEEDED TO UPDATE A DATED DRESSER-
Affiliate links have been used
- Dated dresser (You can find my favorite sources HERE)
- Dark Antique Wax
- (2) 1" x 6" x 6' Wood Board
- Drill and Small Drill Bits
- 120/320 Grit Sanding Pads
- Hammer and Nail Pop
- Screwdriver
- Lint-Free Rag (for applying wax)
- Paper Towels
- Simple Green (for cleaning furniture after sanding)
- HOW TO UPDATE A DATED DRESSER INTO A VINTAGE BOHO INSPIRED CHEST -
I started with a little three drawer dresser that was solid wood but definitely dated.
(You can read more about my favorite secondhand furniture sources and questions I ask when buying online and what to look for. )
Once the wood was removed, I measured and cut the 1" x 6" x 6' board into three pieces (cutting the corners at 45-degree angles).
I attached the wood with construction adhesive (I couldn't find my wood glue, but either will work) and my Ryobi Airstrick Nailer. I filled all the nail and old hardware holes with wood filler then scuff sanded the entire dresser with 120 then 320 grit sandpaper.
I was a little nervous trying out such a bold paint color, but I'm loving the vintage boho vibe of this once dated dresser. I hope this transformation inspires you to update your own dated furniture into something you are proud to have in your home.


Great job!
ReplyDeleteI am obsessed with this one!
ReplyDeleteLove this one love the color...great job!
ReplyDeleteIncredible. I love the way you changed the bottom and changed the entire look of the dresser. You are extremely talented and have great "vision" for the potential of old pieces. Thank you for the tips and resources.
ReplyDeleteI just love this upcycle! Beefing up the bottom totally changes the look of the piece and I just adore those drawer pulls!!!
ReplyDeleteThanks for sharing:)
I love this color. I'm definitely going to have to try it. New to your blog. Subscribed.
ReplyDeleteI love how this turned out!! I'm crushing over that fern paint...I've seen so many cool projects using the Fusion but no one around me sells it. I added your link to my weekly roundup post today.
ReplyDelete