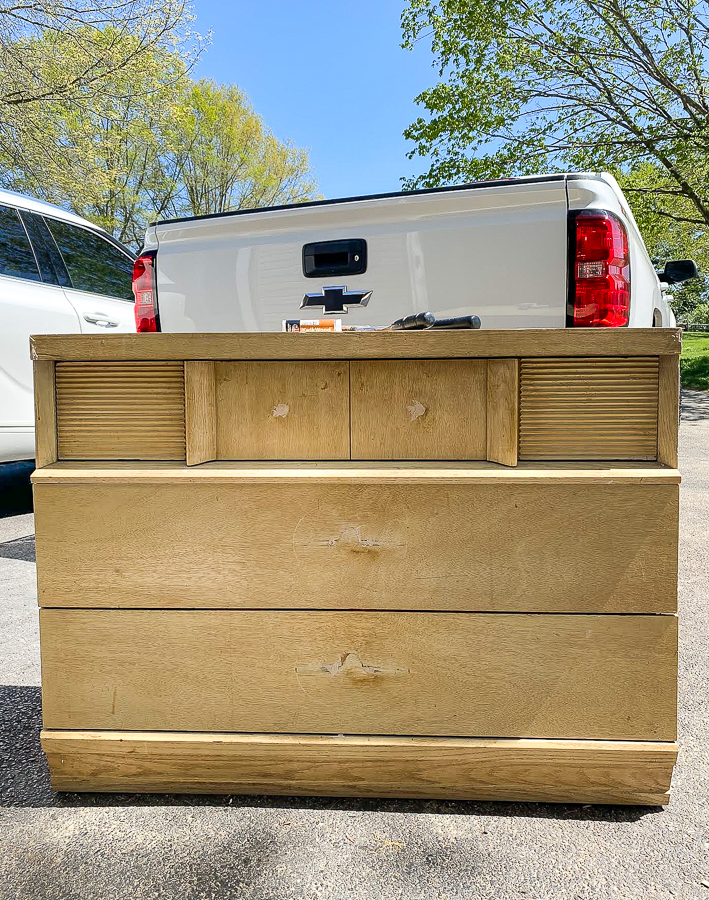
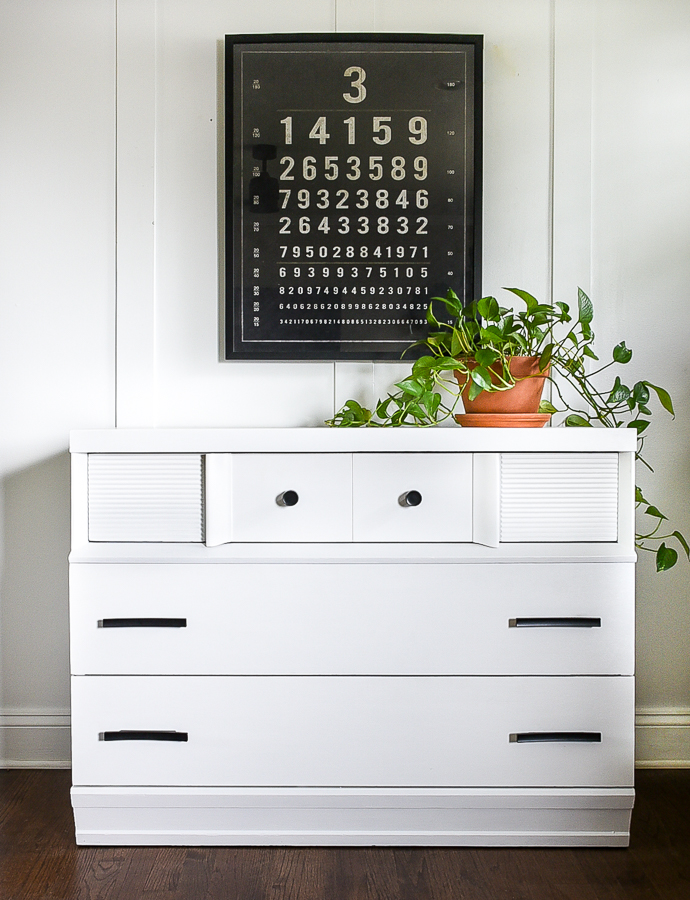
A dated and damaged mid-century modern dresser gets a fresh update with new paint and hardware!
I haven't been blogging much, but I have been cranking out some furniture makeovers.
Recently, I picked up a little three drawer mid-century modern dresser from one of my favorite used furniture sources, Facebook Marketplace.
I loved the style and fluted drawer, but it definitely needed some work. It was missing hardware, had some damage and a bit of loose and missing veneer. It was nothing that couldn't be fixed though, so I headed out to pick up the dresser and got started working on it right away.
- SUPPLIES NEEDED TO UPDATE A DATED DRESSER -
Affiliate links have been used
- 80/120/320 Grit sandpaper
- Chisel
- Hammer
- Screwdriver
- 6" foam roller and tray (for applying primer)
- Inexpensive paintbrush (chip, foam, etc.) (for applying primer)
- Hardware
- Drill and drill bits
- Tape measure
- HOW TO UPDATE A DATED DRESSER -
What do you think? Would you have passed this little dresser up or do you see the potential like I did?
I knew I wanted to change the hardware placement, so I started by filling all the old hardware holes with my favorite wood epoxy. I used the same epoxy to touch up some damage on the corners as well as fill in a few deeper knicks and gashes.
There was some loose and missing veneer on the sides of the dresser, which I was able to easily remove with a chisel and hammer. For the few stubborn areas, I used my Dewalt Orbital Sander and 80grit sandpaper to sand off the thin strip of veneer.
I wanted to paint the dresser white, so I primed the dresser with two coats of BIN Shellac primer. Priming before painting furniture white not only blocks wood tannins from bleeding through, but also gives a good base and limits how many coats of paint is needed to get full coverage.
I prefer to use a 6-inch foam roller to apply primer then sand with 300 grit sandpaper before applying paint with a good quality brush. For this dresser, I added 3 coats of General Finishes Snow White then sealed the paint with Minwax water-based poly.
Once the damaged veneer was removed and the wood putty was dry, I sanded the top of the dresser and the drawer fronts down to bare wood then gave the rest of the dresser a light sanding.
I prefer to use a 6-inch foam roller to apply primer then sand with 300 grit sandpaper before applying paint with a good quality brush. For this dresser, I added 3 coats of General Finishes Snow White then sealed the paint with Minwax water-based poly.
You know I like black and white, so I finished off the dresser with flat black knobs and pulls from Home Depot.
The crisp white paint and new hardware placement completely changed the look of this once dated mid-century modern dresser. What do you think?


Wow! The dresser looks awesome. I love following your makeovers. You give me the incentive to keep my dresser that I have had since I was 16. It is a keeper as it has the dove tails in the drawers. You go girl
ReplyDeleteGorgeous! Great Job!
ReplyDeleteThat really does look amazing! Great job! Can I ask how much you paid for it just curious?
ReplyDeleteGreat work sis!
ReplyDeleteBeautiful! I have loved your style since I first started following you a few years ago. You never disappoint!
ReplyDeleteLooks amazing!! I’m excited to tackle my own project-may I ask how much paint it took for 3 coats?
ReplyDelete