Learn how to make an easy DIY vintage sign - no fancy cutting machine required!
Did you know that I LOVE vintage wood signs? Did you also know that authentic vintage signs are crazy expensive?
I was following an online auction the other day and was completely BLOWN AWAY by how much an old weathered wood sign sold for. Like, shaking my head and wondering what the heck I am doing painting and selling furniture and not vintage signs kind of blown away haha.
It was after that auction that I got inspired and immediately got to work making my own vintage-inspired sign.
I'm not picky when it comes to old, chippy and perfectly aged signs. Although, I am partial to vintage medical decor and ephemera, so I opted to make a vintage-inspired doctor sign for above my card catalog.
Follow the step-by-step directions below to make your own customizable DIY vintage sign.
- SUPPLIES NEEDED TO MAKE A DIY VINTAGE SIGN -
Affiliate links have been used
- Old rough cut oak boards (or similar)
- Mitre saw
- Drill
- Nail gun
- 1 1/2" nails (for nail gun)
- Gold Spray Paint (optional)
- Pen
- Ruler
- Chain
- Alphabet letters or printed letters
- HOW TO MAKE A VINTAGE WOOD SIGN -
STEP ONE:
Decide how long you want your sign to be then using a miter saw cut your board to length.
STEP TWO:
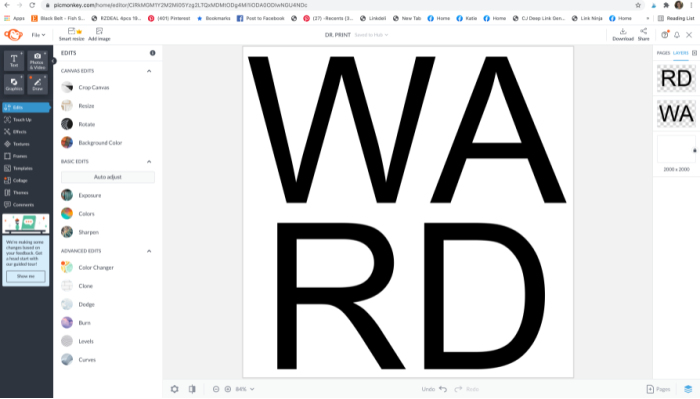
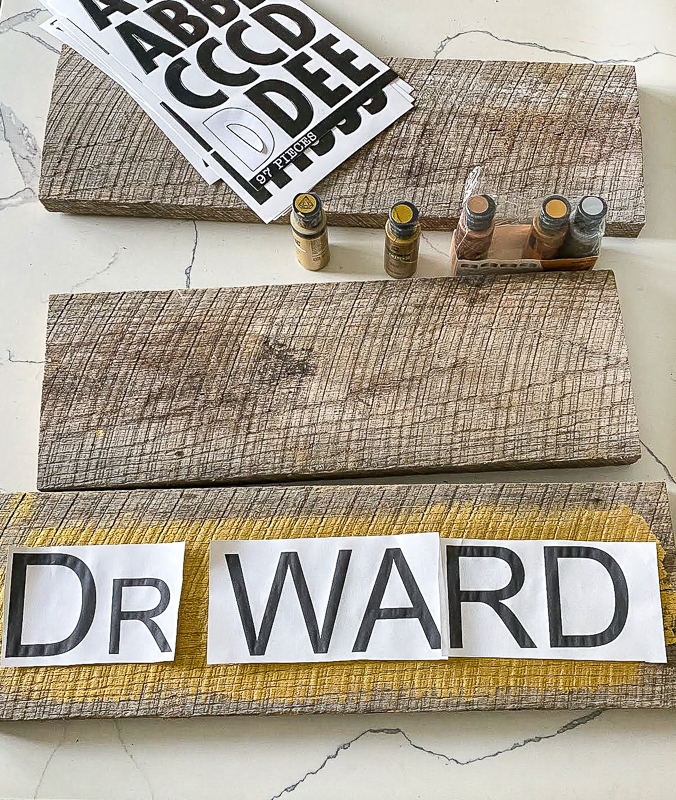
Using Word or a similar program (I used PicMonkey), pick a font and size for your letters then save and print them out. I made my letters fairly large, so I ended up needing to create two documents for my sign.
STEP THREE:
Now that you have your sign board cut and letters printed, measure and cut the furring board to create a border for your sign. I cut the small side pieces to the length of my sign then made the top and bottom pieces longer, so they butted up to the side pieces.
(You can also cut the boards at a 45-degree angle for a more polished/professional look. A lot of vintage signs are handmade, so I was going for quick and imperfect.)
Decide what color you want your letters to be then paint 1-2 coats onto the board. In my case, I wanted gold letters, so I used gold metallic craft paint.
STEP FIVE:
STEP SIX:
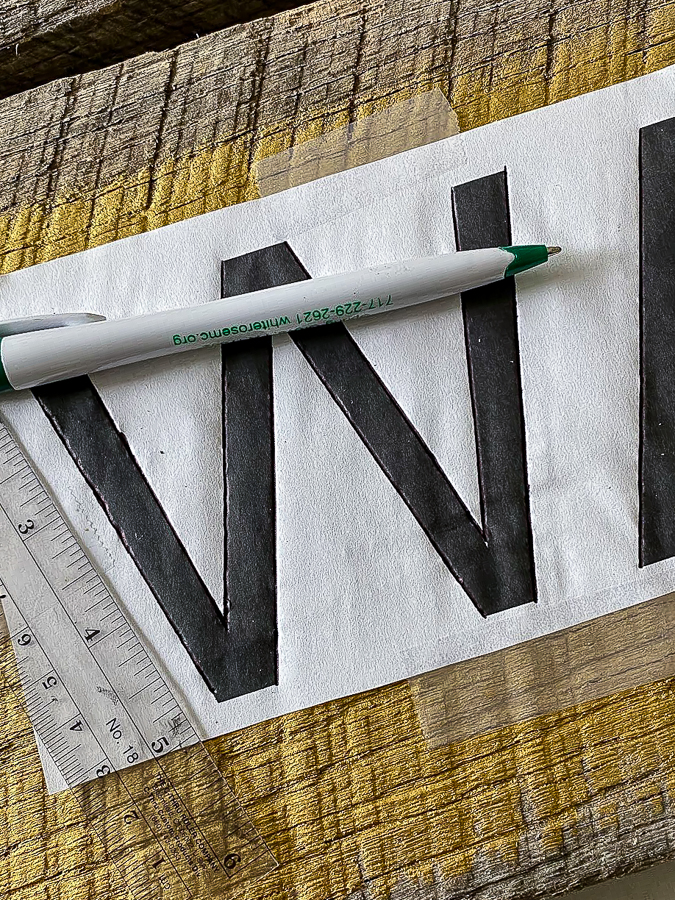
Using a ruler or straight edge, trace the letters onto the wood using a pen (I find a pen works best). This will leave an imprint of the letters that you will be able to paint around.
STEP SEVEN:
Using a small craft brush, outline your letters with the color you want your sign to be (in my case this was black). I used a small brush to outline all the letters first then painted the rest of the sign with a larger brush. Don't worry if it's not perfect. You can always go back with the color of the letters and make any touch ups.
While you are working with the main sign color, go ahead and also paint the furring pieces that you cut for the border.
(OPTIONAL: Add a painted border to your sign using the same color that was used for the letters. I did mine freehand, while also using a ruler to make sure I was creating somewhat of a straight line.)
Remember, most vintage signs are handmade and are very aged and weathered. You are not aiming for perfection.
STEP EIGHT:
Once the paint is dry, use 120 grit sandpaper or sanding block to sand and distress your sign and cut border pieces.
(OPTIONAL: Distress sign further with a chain, hammer, screws, etc.)
STEP NINE:
Now it's time to add a little more interest to the sign by attaching the border pieces.
Working on one side at a time, apply a small amount of wood glue to the end of the sign then using a nail gun, attach the appropriate border piece. Repeat until all four border pieces are attached.
*** TIP*** I found it easiest to attach the two shorter pieces first then add the top and bottom pieces.
STEP 10:
Pre-drill two holes in the top of the sign, screw in two eyelet screws then add a chain for hanging. I did spray paint my eyelet screws gold, but that is completely optional.
*** TIP *** If you prefer not to hang your sign from a chain you can add two D-ring picture hangers to the back instead.
STEP 11:
Finish off the sign by sealing the paint and wood with dark antique wax.


Thank you for sharing this awesome idea. I love it!
ReplyDeleteIt is so interesting to me that you painted your sign the color you wanted your letters to be, then painted the black back on the background of the sign leaving the letters the gold! I would have expected you to paint the sign black and then paint the gold letters on top. So I really had to adjust my thinking! I really think your way is easier than trying to carefully paint the letters on top. Well, you have taught this old dog a new trick today!
ReplyDeleteI've actually made signs both ways, but find it easier to paint around the letters instead of filling in the letters. Neither way is right or wrong and is completely a personal preference :)
Delete