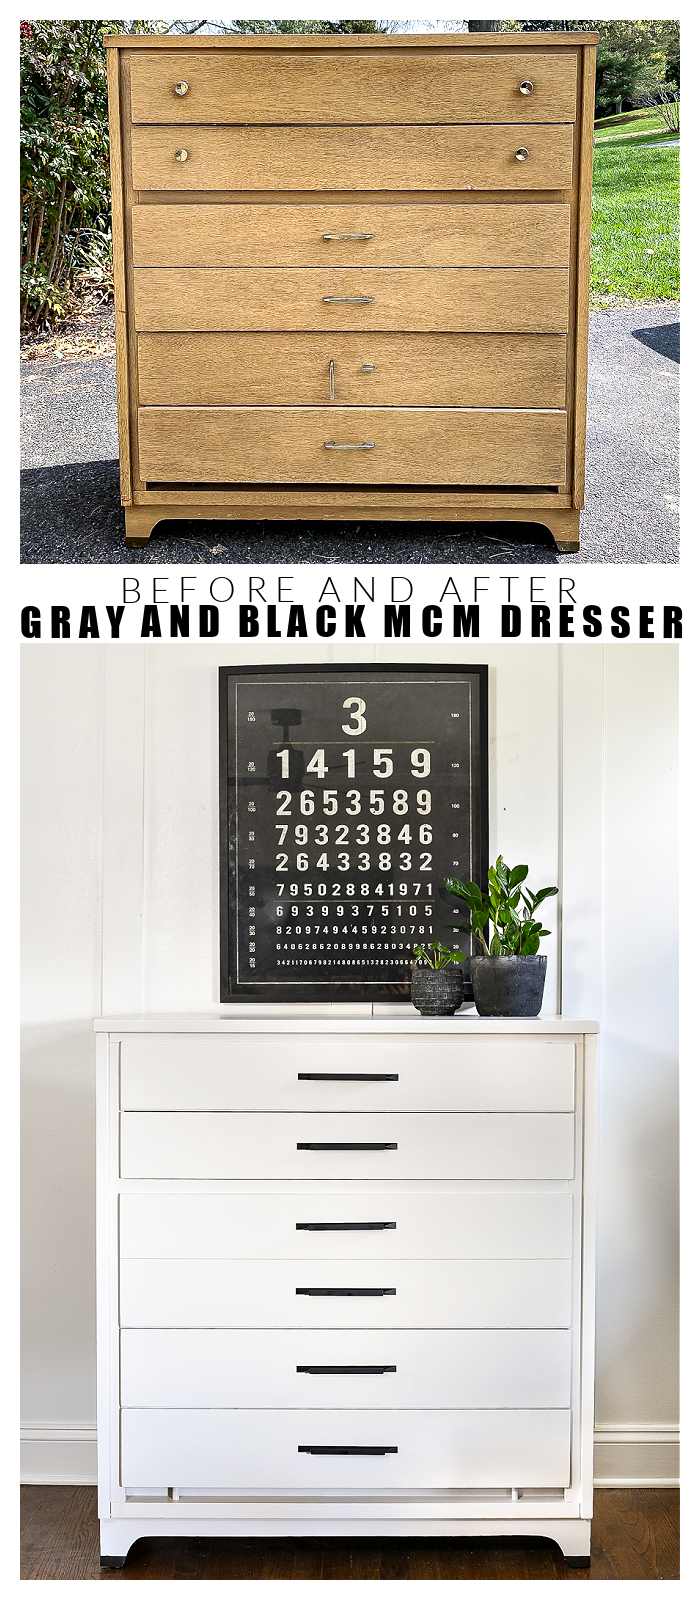
A dated MCM dresser gets a new look with light gray paint and black modern pulls!
It's furniture makeover time!
The other week, I picked up an MCM dresser that I found off Facebook Marketplace. I knew it needed some work, but I expected that due to the very affordable price.
I repaired, painted and updated the basic mid-century modern dresser with a beautiful creamy gray and sleek black modern pulls for the perfect modern makeover.
SUPPLIES NEEDED TO PREP, REPAIR AND PAINT A DATED DRESSER
- Dresser (I found mine on Facebook Marketplace)
- Minwax Water-Based Poly (matte finish)
- 150 and 320 Sanding Pads
- 400 Grit Sanding block
- Paper Towels
- FURNITURE SUPPLIES -
Originally, I wasn't planning on blogging about this mid-century modern dresser makeover, so I cranked it out quickly without stopping to take step-by-step pictures. I'll include some helpful blog posts below if you would like more detailed information on how to repair, prep and paint wood furniture.
Helpful articles on how to prep, repair and paint furniture:
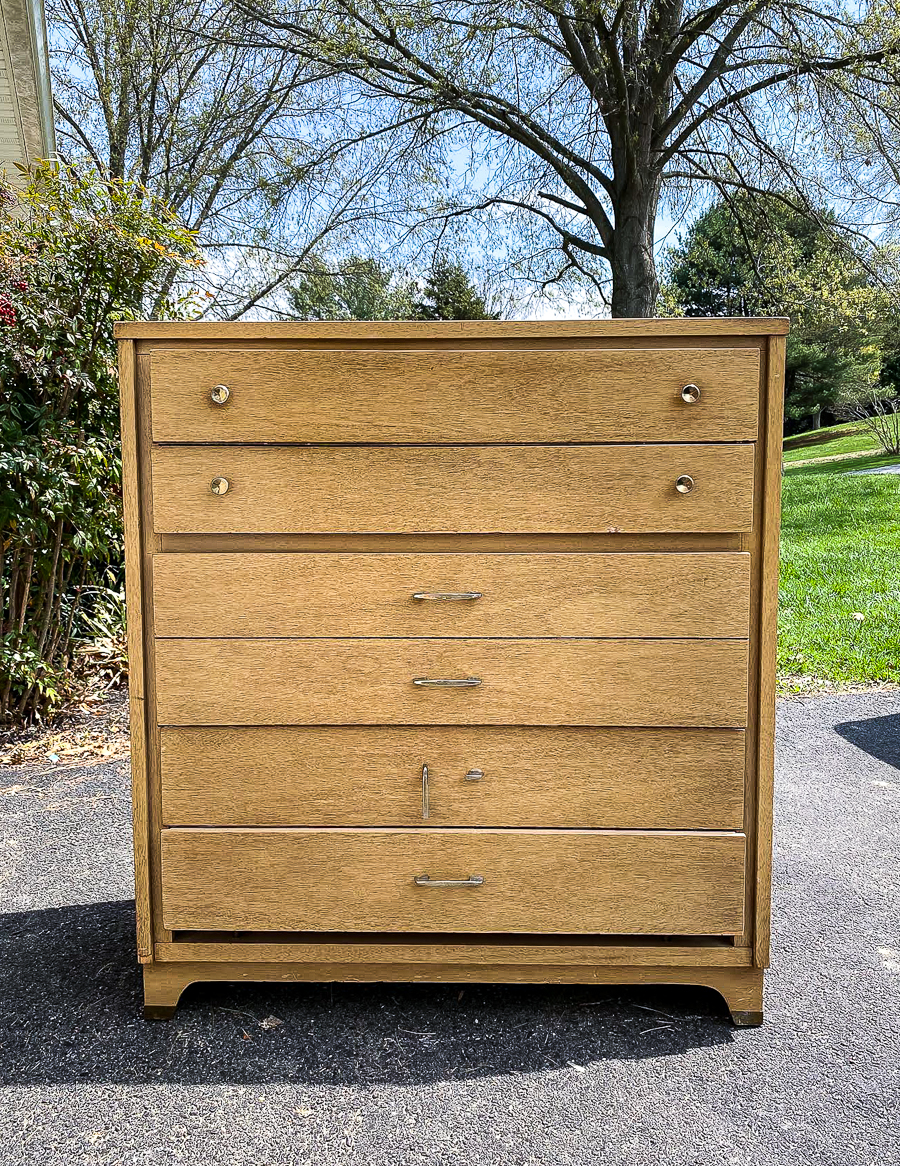
Before I get to the furniture makeover steps, let's take a look at the dresser before I gave it a makeover.
The dresser had broken hardware, dovetail drawer joints that needed to be repaired, veneer damage and a missing drawer glide. It seemed like a lot of work, but luckily, they were all easy and doable repairs.
STEP-BY-STEP GUIDE TO A PAINTED FURNITURE MAKEOVER
STEP ONE:
Remove hardware and clean the dresser well with a good cleaner such as LA's Totally Awesome or Simple Green. This allows you to see what dirt/damage can be cleaned and what needs to be repaired.
STEP TWO:
Use Kwikwood wood epoxy to fill hardware holes (if new ones are being drilled) and any veneer chips, gashes, damaged corners and other imperfections.
STEP THREE:
Using an orbital sander, sand the wood epoxy smooth then scuff sand the rest of the dresser. Start with 150 grit sandpaper then finish with 320 grit. After sanding, thoroughly clean the dresser again to remove all sanding dust
STEP FOUR:
Apply two coats of Fusion Mineral Paint using a good quality paintbrush. Lightly sand with 400 grit sandpaper between coats.
*** PLEASE NOTE*** there was no need to prime this particular dresser due to the wood being a light tone. If you are painting over dark stain or wood, you will need to properly prep the furniture with a good quality shellac primer.
STEP FIVE:
Seal paint with two coats of water-based poly, again sanding with 400 grit sandpaper between coats.
STEP SIX:
Reattach original hardware or measure placement for new hardware, drill holes and attach new hardware.
White and wood will always be my favorite furniture combination, but this beautiful creamy light gray paired with matte black pulls is quickly becoming a new favorite.


That looks beautiful. I love the lighter color!
ReplyDeleteIsn’t it wonderful that we can redo these older and very well built pieces to make them our own! I’ve had my current bedroom set almost 30 years and until recently it didn’t even have a blemish. I am thrilled with the blemish because I want to paint it so bad!!! LOL it’s a beautiful set but it’s time to be a new color!
ReplyDelete