Learn how to create a real wood look and turn Dollar Tree plastic domes into vintage cloches!
How about an affordable vintage-inspired craft project to kick off 2024?
It's been almost two years since I shared a Dollar Store DIY! How is that even possible?
I was itching for an affordable craft project, so I headed to Dollar Tree to see what I could find.
I immediately stopped when I saw a shelf full of plastic dome cloches. They were marketed for floral displays, but I knew I could use a simple paint technique to give them a real wood finish and the perfect vintage makeover.
SUPPLIES NEEDED
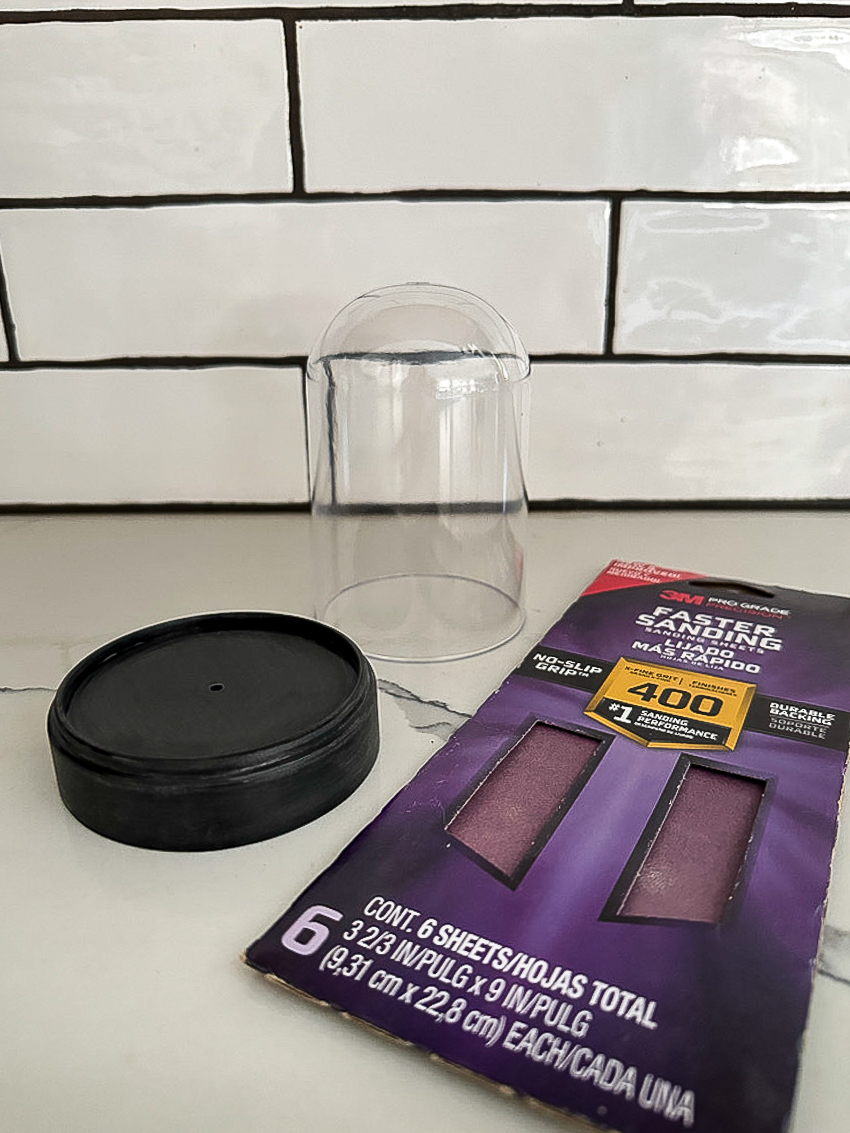
- 400grit sandpaper
- Flat white primer spray paint or paint and primer in one
- Craft paint brush
- Paper Towels
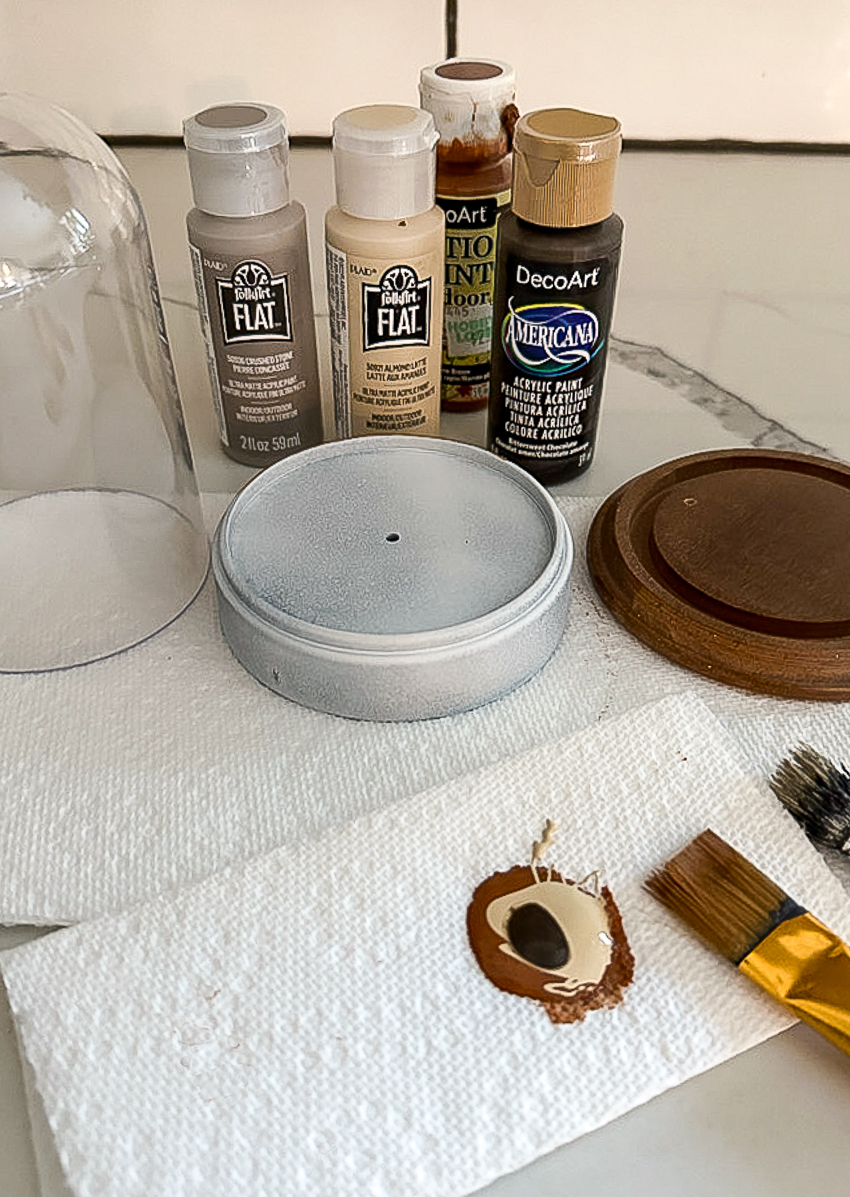
I tried to mimic the stain color of a vintage wood cloche base I was using as inspiration. You can make your faux wood color whatever shade you prefer. Just be sure to pick three shades of coordinating paint colors.
STEP-BY-STEP TUTORIAL: HOW TO CREATE A FAUX WOOD FINISH AND MAKE ANYTHING LOOK LIKE WOOD
First, you need to head to Dollar Tree and pick up one (or a few!) plastic dome cloches. They are in the garden section, so if your local store has not stocked garden inventory, you may need to order them online.
STEP ONE: PREP SURFACE
For the best paint adhesion, lightly sand the shiny plastic cloche base with 400 grit sandpaper and then wipe clean to remove any sanding dust. The goal is to scuff up the base without scratching the plastic.
STEP TWO: PRIME
Spray the plastic cloche base with a light coat of primer and allow it to fully dry. Applying a primer base coat is imperative and should not be skipped. Acrylic paint will NOT adhere to plastic and will scratch and peel off if a surface isn't properly primed.
To keep this project affordable, I used paint colors I had on hand, including light tan, rust, and dark brown.
To give the base layer variation in color, I layered all three colors on a paper towel and then applied the paint to the base of the cloche.
Tip: I strongly advise using flat acrylic or chalk paint to reduce unwanted shine.
After the first layer of paint is dry, apply a second layer of paint, making sure to add a little more dark brown for contrast and texture. Keep layering paint until you are happy with the color variation.
STEP FIVE: DRY BRUSH FINAL PAINT LAYER
Once you are happy with the color of the "wood" base, dry brush a final layer of dark brown paint to create a faux wood grain. Apply a small amount of paint to a paper towel, dip the tip of the bristles into the paint, dab the brush onto the paper towel to remove excess paint, and then lightly apply to the cloche base in long strokes.
It's important to use a stiff bristle brush when dry brushing. This helps mimic the look of natural wood grain that a soft bristle brush can't accomplish.
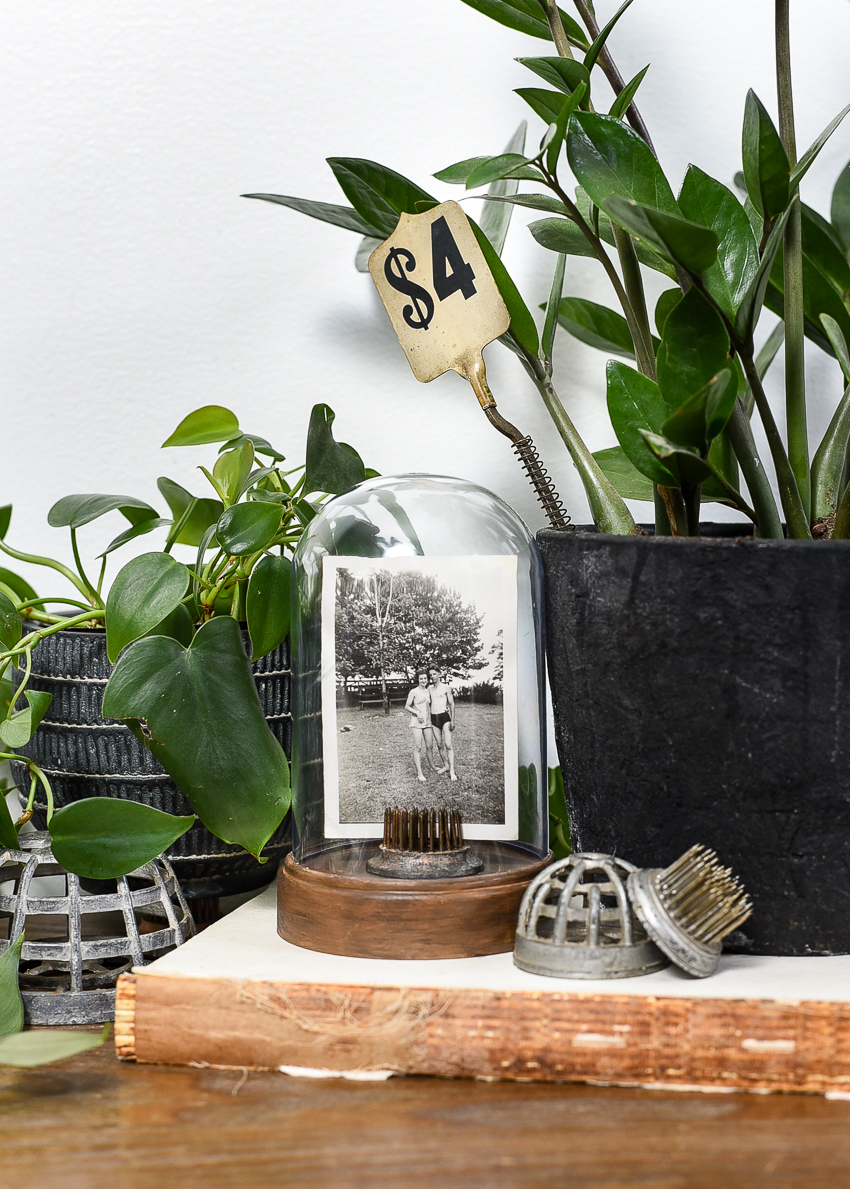
The finished vintage-inspired faux wood cloche turned out better than I expected. It's the perfect size to display one of my favorite old pictures of my grandparents.
The plastic domes are small, but they would make a great addition to a bookshelf or cabinet to display vintage photos, collections, or oddities!
What do you think? Is this a Dollar Tree project you will create?


I love love love this!!! I need some new cliches and this may be the answer! Great project!
ReplyDeleteI just love these but I don’t see mention of the frogs in your post. Do you have somewhere that you buy those that might not break the bank? Lol Well at least not too pricy!
ReplyDeleteHi! The most affordable places to find flower frogs are auctions, estate sales, and flea markets. You can also find them online on Ebay and Etsy, but chances are you're going to pay a lot more for them. I hope that helps!
DeleteThank you! I hadn’t thought about Etsy and I’m on there almost daily..lol. I did find some on Amazon as well. I’ll have to check the antique malls right here by me too, hadn’t thought about that either. Again thanks!
DeleteI love this sweet transformation!! I have so many ideas for these so I do hope I find them in our Dollar Tree stores...Thanks so much for sharing!!
ReplyDeleteHugs,
Deb